Are you new to SPIP ?
SPIP is a modern, collaborative and multilingual PHP publishing system and web development framework.
See : spip.net
Attention ! This plugin does NOT actually process any design or styling. It just lets you easily build menus and generates their HTML display.
For everything related to menu styles, check your templates out or see some dedicated (and compliant) plugins, such as
- Animated dropdown menu
- Menu Déroulant 2 (a simple dropdown menu)
- Menu Accordéon 2 (an accordion jquery menu)
- jQuery Superfish menu (animated dropdown menu)
How to install ’Menus’ plugin
Download the ZIP package and upload its content into your plugins/ directory. Then you’ll have to enable it in the admin area : Configuration > Manage plugins.
Read more on how to install a plugin for SPIP
You should also have the Bonux for SPIP 3.* plugin installed & enabled.
How to create a new menu ?
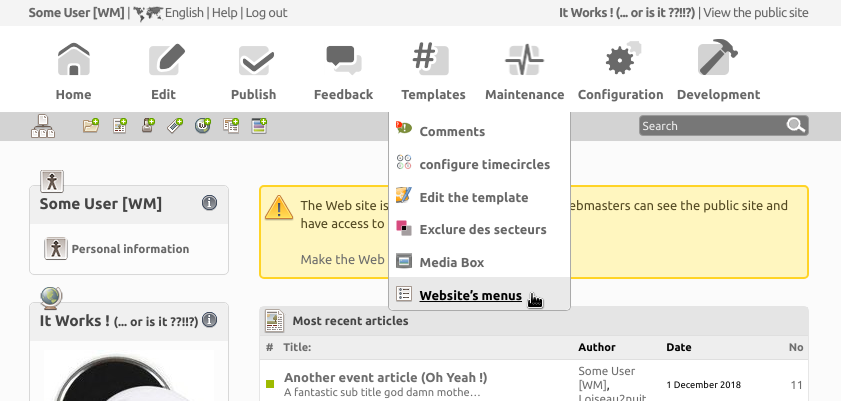
The plugin adds a new entry in the SPIP admin menu : Templates > Website’s menus
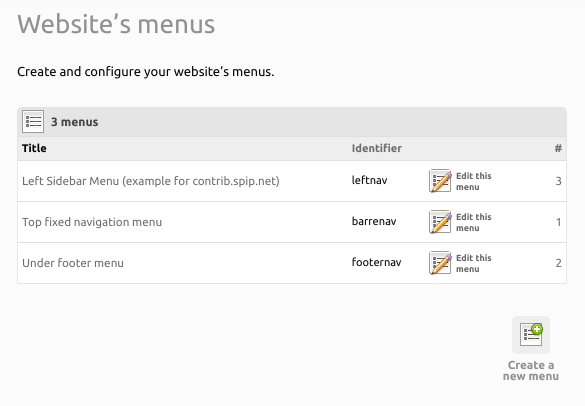
The admin page lists all your menus and lets you create new ones :
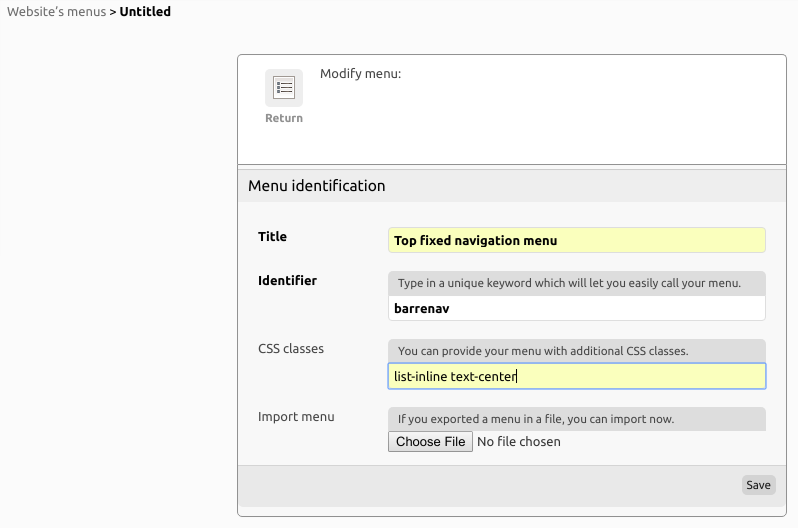
First you will have to identify your menu.
Let’s give your menu a title and a mandatory text identifier, which will let you easily call for it wherever you need it (because while coding your templates, it’s hard to know in advance what will a menu’s numeric ID actually be).
Thanks to this identifier, you won’t have to edit your templates multiple times. Besides, you also can provide a CSS class to the first generated UL element. This, letting you style that element, according to any other ’menu display’-related plugins (e.g. specific class to generate specific jQuery effect) ...
You can then start building the menu with your own entries :

Entry types
’Menus’ comes with more than 10 entry types, already offering to build most of common menu types.
Feel free to suggest your own !
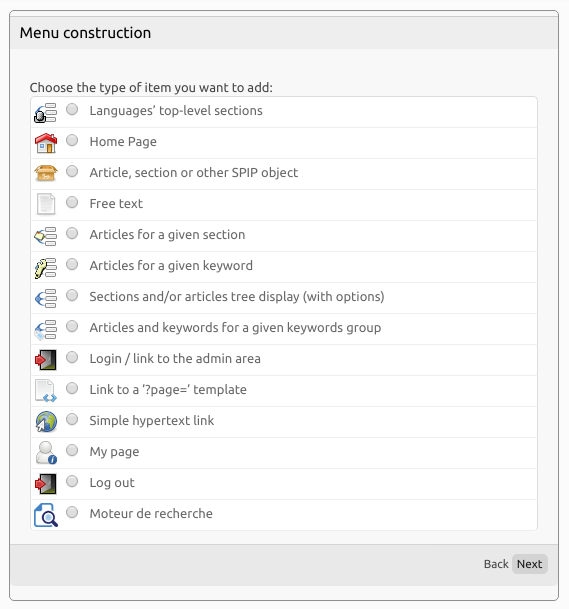
Here is a brief description of some available entry types :
Simple hypertext link
This entry creates a link to any chosen URL, with a link text.

SPIP objects
Creates links to any SPIP object (article, section, keyword, ...) or any plugin-induced new object (ex. organisation, contact, ...)

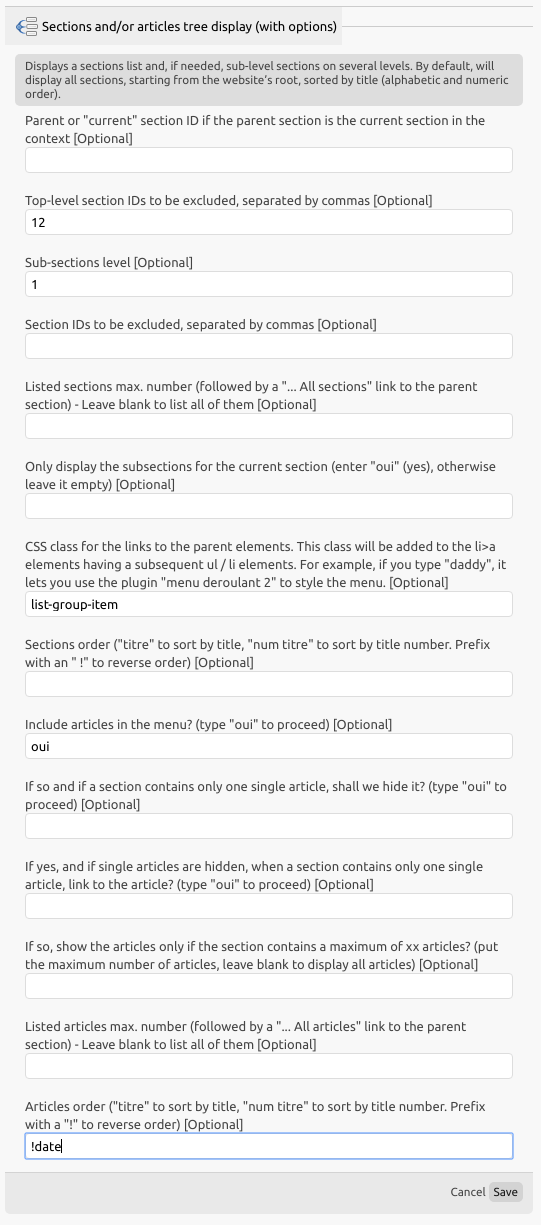
Dynamic sections/articles tree
Displays a tree-menu of any chosen ’root’ section by simply providing it’s ID, and a maximum display level for sub-sections, excluded elements’ ID if any, sort options, ... You can also choose to include articles in the display.
How to edit an entry ?
If you already added a menu, you’ll see its entries as following :
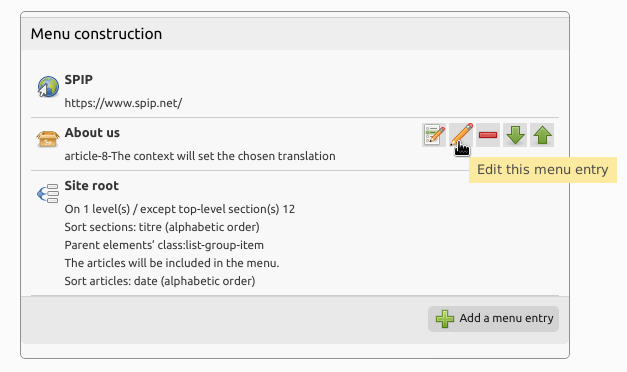
You can then :
- re-order those entries,
- delete any of them,
- change their settings as wished,
- add sub-level menus to entries allowing them,
- ...
How to use menus in your website ?
To show a menu on your website, simply add this code in the template of your choice :
#INCLURE{fond=inclure/menu, env, identifiant=<your_menu_identifier>}You can also easily test your menu, clicking on « see online » button or, accessing https://<your_website_url>/spip.php?menu<MENU_NUM_ID>
How to export menus to another SPIP website ?
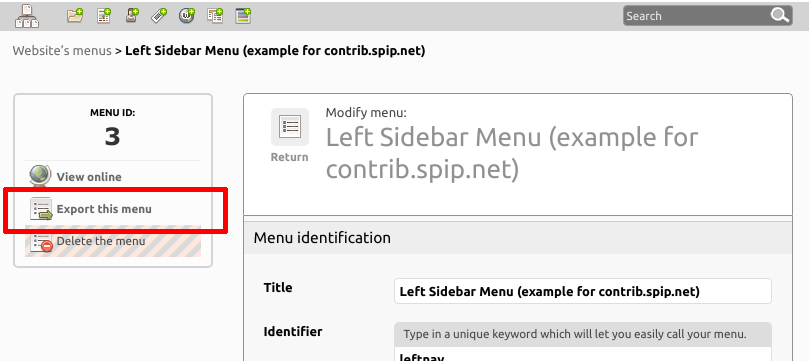
Let’s say you’re you are re-organizing all menus on a local working copy of your website. If you wan to report those modifications online, you can export your local menus as a YAML file, that you’ll be able to re-import from your production website [1]
This feature needs YAML V2 plugin for SPIP 3.* installed & enabled :
As soon as it is, a new « export this menu » icon appears.
Save it on your computer

On the destination website, create a new empty menu with the same text identifier (or, if it already exists : delete & replace it). If YAML plugin is enabled, a dialog box offering to choose files should be displayed.

Overwriting menus/<type>.html file types
If, for any reason you need to overwrite a menus/*.html file or even the entire directory, be sure to also copy the XML description files that comes with. The plugin actually needs those files to be in the same directory as the working HTML files.
Aucune discussion
Ajouter un commentaire
Avant de faire part d’un problème sur un plugin X, merci de lire ce qui suit :
Merci d’avance pour les personnes qui vous aideront !
Par ailleurs, n’oubliez pas que les contributeurs et contributrices ont une vie en dehors de SPIP.
Suivre les commentaires : |
|
